Installation
Note: The diagrams show a W2B200 Water softener, the procedure is the same for your softener.

Please respect your local plumbing codes and regulations.
Before installing the water softener make sure you have turned off your mains water.
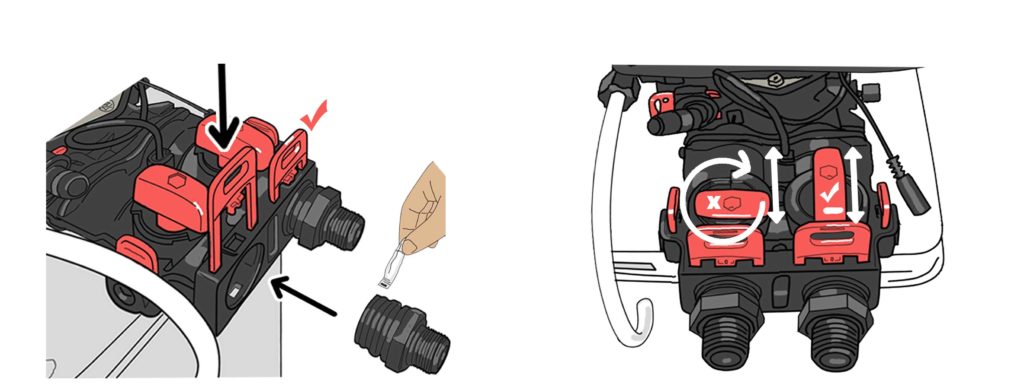
Check all 5 red fasteners are present and clipped securely.

Make sure you can reach a power source from your install point.
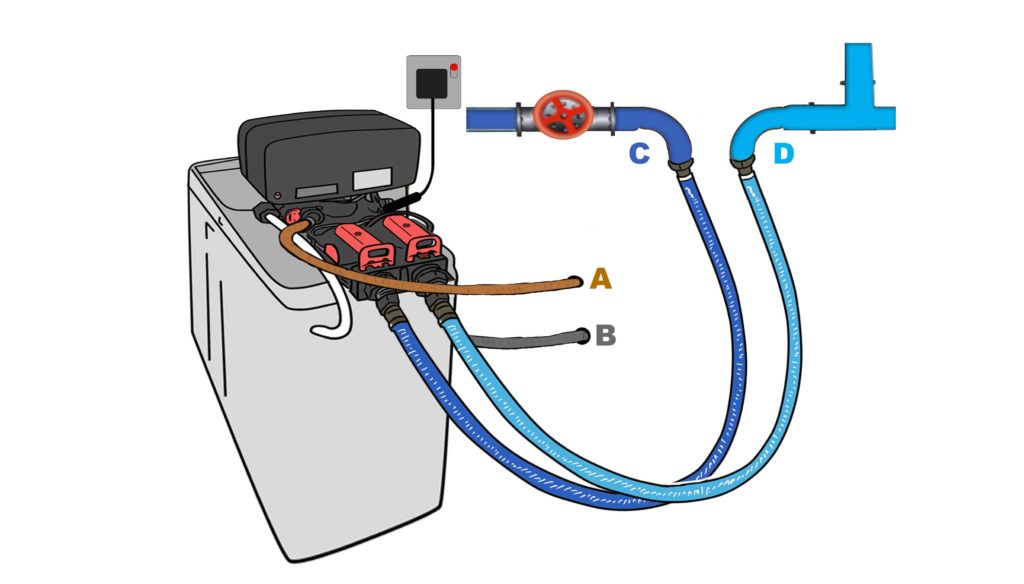
Connect the waste fitting (A) to the waste. The fitting takes a 15mm tubing.

Connect overflow (B) to a suitable overflow location separate from the waste. The fitting takes a 15mm tubing.
Connected the water feed hose (C) to the Inlet on the water softener, and the return hose (D) back to the water supply.
the IN & OUT flow directional arrows indicate the correct way to connect.
Turn on your water and power.
Check for leaks at all joints.
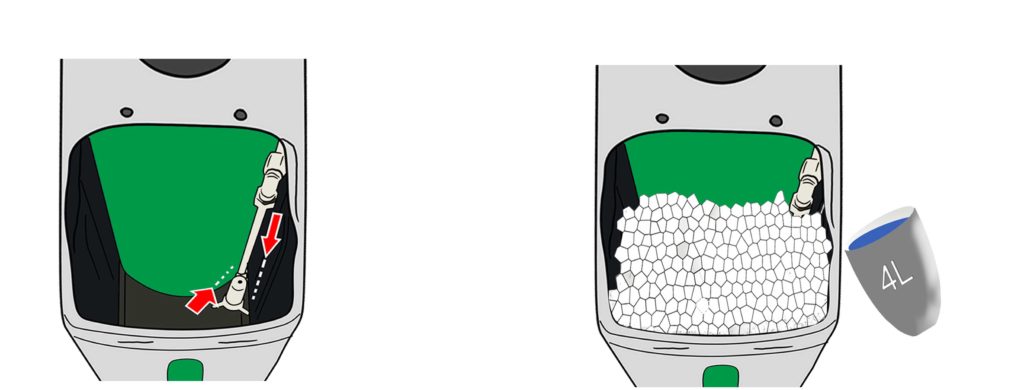
Inside the salt tank, make sure any internal components are tucked neatly along side the vessel
Fill the tank with Water Softener Salt
Add 4 liters of water to the salt tank.
Check for leaks at all joints every 30 minutes until satisfied that there are no leaks.
Next: Visit the Settings page to generate optimal settings for your home.
Video: Perform these pre-checks to avoid common problems
Video: Demonstration of installation with plumbing.
